

Drawing A Still Life
Materials
2B charcoal pencil
kneaded eraser
metal pencil sharpener
easel*
drawing clipboard*
Step 1: Set Up Your Still Life
You could just place an object next to a window or lamp, but if you want to try something more challenging, you can use things you have at home to set up a still life.
I used a pillow case, a few objects I already own and a cheap clamp light I got at Home Depot. You can use any kind of lamp you have at home.
Step 2: Set Yourself Up
Choose an interesting angle to sit and draw from. I'm using an easel and a drawing clipboard to make recording easier--these are not necessary, though the drawing clipboard can be very useful.
I recommend using a larger newsprint pad for still life drawing because it's cheap and the more room you have, the less likely it is that you'll run out of space as you begin to draw.
Step 3: Study Your Still Life
Look at your still life and describe to yourself what the silhouette of the collective objects looks like. Mine has a shorter shape on the left, a slightly taller shape in the middle, and a rounded object on the right.
Using this information, begin to make light marks to indicate the space where your sketch will be. Visualize the vertical and horizontal midpoints of your composition ad notice where the objects are in relation to them.
Lightly begin sketching the larger shapes in place and continue to look at your still life to gather more information. Avoid "making up" things to make your sketch look pretty. Focus only on drawing the shapes that you see in front of you, even if your drawing looks terrible.
The smartest thing to do is to accept that your drawings won't be the best. But remember that every bad drawing is a step toward a better drawing!


Step 4: Begin Defining Your Shapes
Now that you have a general sketch laid out, begin to take a closer look at the shapes that make up your objects and how they're aligned with each other.
If you're feeling stuck, it's helpful to pause and take a few steps back from your drawing. It's easier to compare your sketch to the still life from a short distance.
Avoid using self-deprecating phrases like "this doesn't look good". Instead, focus on finding adjectives that describe the discrepancies between your sketch and the still life. For example, you may notice that your drawing looks longer or wider than the still life; some shapes may need to be sharper or more curved. Try to look at it as a learning experience rather than a competition.
Once you start thinking this way, you'll be able to make better adjustments to your sketch as you go.

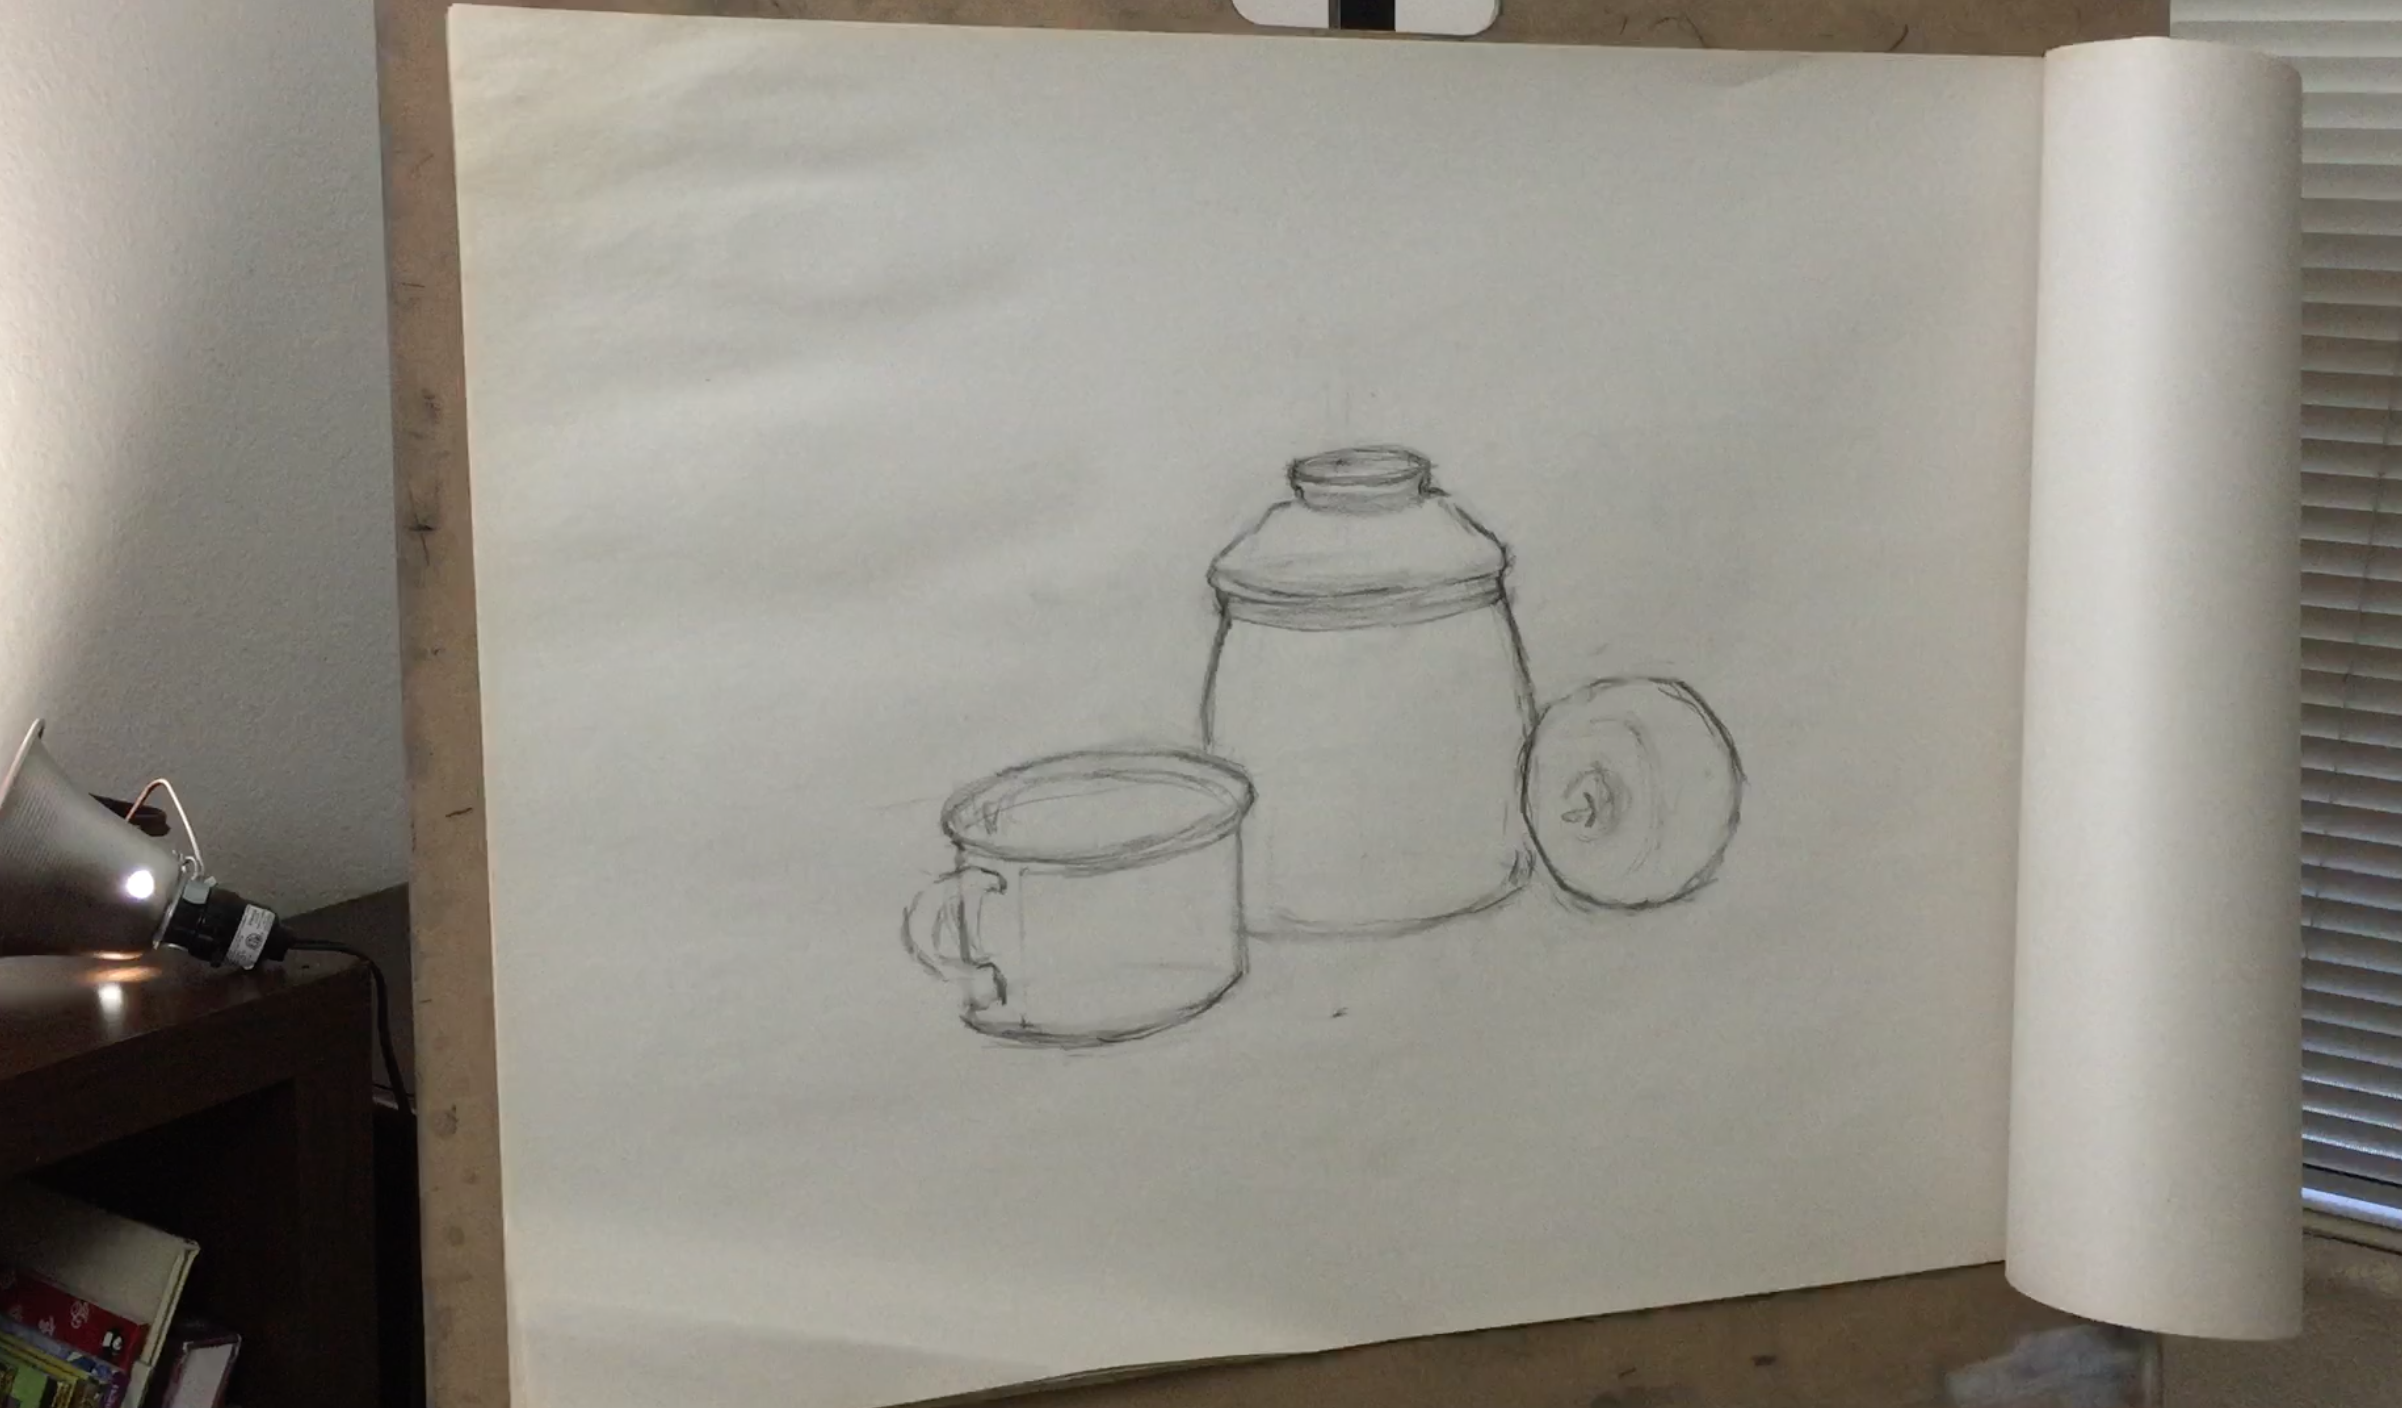
Step 5: Continue Adding Detail
Continue adding detail to your drawing, going from largest shape to smallest shape until your drawing feels complete.
Make sure you continuously look up at your still life. Don't allow yourself to keep your eyes on the page for more than a few seconds you'll begin to try to "fix" things to look better.
Take your time and thin before you put marks down on the page. Every mark you make should be based on an observation you made from the still life.
I know this process can be a little nerve-wracking at first, but if you keep trying I promise you'll notice improvements in your drawing skills.


Note: this drawing took about 30 minutes from start to finish.

