Setting Up A Still Life
Materials
- fabric(s)
- tape, push pins, etc (to hold up the backdrop)
- interesting objects
- light(s)


Step 1
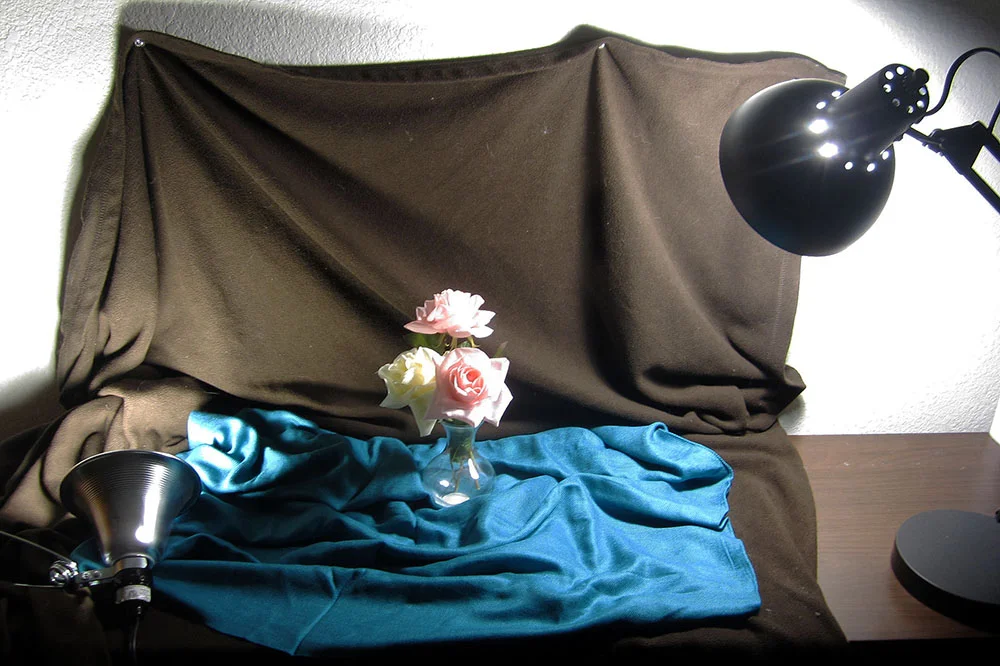
While it isn't necessary, a backdrop does give you control over the environment you'll be working with. You can take advantage of this and choose colors, textures and patterns that will enhance your composition. You can use any kind of fabric for your backdrop. I used a scarf and blanket. I've also used sweaters, T-shirts, pillow cases, etc. You can use anything that has a nice color or texture. You can also go to a fabric store and buy fabric by the yard if you're wanting to work on something larger.
To secure your backdrop, pin, tape, or clamp it to a wall or surface. If you don't have a surface you can attach the backdrop to, get creative. Stack up some boxes, pile up some books, use a shelf, etc. There is no right or wrong way to do this.
Besides the backdrop, you can add a different fabric for your objects to sit on to create further contrast and visual interest.

Step 2
Place your objects in an interesting composition. Where and how you place your objects is up to you. You can place boxes or other objects under the fabric to create elevations within your still life.
You can use any kind of object you like to paint. Some examples include fruit, flowers, items from the dollar store, paper weights, boxes, jewelry, etc.
Remember to take into account where you will be sitting or standing and at what angle you will be viewing your still life.

Step 3
Place your lighting to create whatever effect you want. You can use any kind of light or lamp. I used a cheap clamp light (got it at home depot) and a table lamp in this case. Take into consideration what kind of light you'll be using (daylight, white, yellow, LED, etc.).
This is important because the color and quality of light you use will change the way your color scheme appears. Don't get hung up on this if you're just starting out, though. Use whatever you have available for now. You'll figure out your preferences as you begin working with materials and experiment as you go.
Your light source needs to be consistent, so if you want to use daylight you'll have to work fast or work at the same time over a couple of days.
Tip: I've found pointing my lights away from my objects and at a white or light colored surface nearby reflects the light back at the objects in a more acceptable, diffused tone.
Play around with the lighting to create an interesting composition and don’t be afraid to mess around with the placement of your objects.
For a dramatic lighting effect, use only one light source pointed slightly away from the object. Turn all other lights in the room off. In case you feel your light is too harsh, you can wrap a plastic bag or white fabric around your light to soften it.

Step 4
Once you're happy with your setup, get comfortable and start painting/drawing!
If you're interested in working from photographs, you can take as many pictures of your still life as you want. It's not a bad idea to build a reference library for yourself. Taking pictures allows you to store an unlimited amount of references for future use. Feel free to treat it as a photoshoot. Change the lighting, add, remove and rearrange your setup, and try as many angles as you want. The more pictures you take, the more options you'll have.
Additionally, working from a photograph allows you to edit it in Photoshop to adjust the contras, saturation, color, brightness, etc. to your liking.


Some examples of approaches you can take.

More Examples


A few images I've worked from and added to my reference library.
Related
Simple Art Tip #9: Create Your Own References